|

|
| Enable/Disable archivelog in 9i |
| Tuesday, May 6, 2008 |
(By default database will be in no archive log
mode)
connect to sqlplus as sysdba
check the archive log mode using,
archive log list;
Database log mode No Archive Mode
Automatic archival Disabled
Archive destination /oracle/visdb/9.2.0/dbs/
arch
Oldest online log sequence 204
Current log sequence 206
issue shutdown immediate;
take the cold backup.
Then startup database in mount stage,
startup mount
once database has mounted issue,
alter database archive log;
This command will enable Database log mode to
Archive Mode.
But still Automatic archival will be Disabled.
To enable Automatic archival process issue
alter system archive log start;
Now Automatic archival will be enabled.
But once if you restart the database it'll be
disabled.
set log_archive_start=true in init file so that
whenever database is started it'll consult with
this parameter and will start automatic archival
process. if you want to change the archive log
destination set log_archive_dest_n for multiple
locations.
if you set this parameter bounce the database
once otherwise issue,
alter database open;
issue,
archive log list;
Database log mode Archive Mode
Automatic archival Enabled
Archive destination /oracle/visdb/9.2.0/dbs/arch
Oldest online log sequence 205
Current log sequence 206
For disable archivelog mode issue,
(Database should be in mount stage)
alter database noarchivelog;
issue,
archive log list;
Database log mode No Archive Mode
Automatic archival Enabled
Archive destination /oracle/visdb/9.2.0/dbs/arch
Oldest online log sequence 205
Current log sequence 206 |
posted by Senthil Kumaran @ 10:28 PM   |
|
|
|
| Online backup 9i & 10g |
|
Online backup in 9i using begin and end backup mode:
----------------------------------------------------
(Database should be in archive log mode)
connect sqlplus as sysdba and do the following
steps:
spool begin.sql
select 'alter tablespace ' || tablespace_name ||
' begin backup;' from dba_tablespaces where
tablespace_name != 'TEMP';
spool off
spool end.sql
select 'alter tablespace ' || tablespace_name ||
' end backup;' from dba_tablespaces where
tablespace_name != 'TEMP';
spool off
then execute,
@begin.sql
check,
select status from v$backup;
it'll show status as active
Copy the data_top and archive log files
to the backup location. After copying
remove the archive log files in archive location.
after copying the datafiles execute,
@end.sql
Check the status,
select status from v$backup;
it'll show status as not active
Online backup in 10g:
---------------------
(Database should be in archive log mode)
connect sqlplus as sysdba and do the following
steps:
Execute,
alter database begin backup;
check,
select status from v$backup;
it'll show status as active
Copy the data_top and archive log files
to the backup location. After copying
remove the archive log files in archive location.
Execute,
alter database end backup;
Check the status,
select status from v$backup;
it'll show status as not active.
Enabling archive log 9i and 10g and restoring
online backups will be in next posting. |
| posted by Senthil Kumaran @ 9:19 PM |
|
|
|
| Creating custom top in release12 |
|
1)Make the directory structure for your
custom application files.
cd $APPL_TOP
mkdir xxrlt
mkdir xxrlt/12.0.0
mkdir xxrlt/12.0.0/admin
mkdir xxrlt/12.0.0/admin/sql
mkdir xxrlt/12.0.0/admin/odf
mkdir xxrlt/12.0.0/sql
mkdir xxrlt/12.0.0/bin
mkdir xxrlt/12.0.0/reports
mkdir xxrlt/12.0.0/reports/US
mkdir xxrlt/12.0.0/forms
mkdir xxrlt/12.0.0/forms/US
mkdir xxrlt/12.0.0/lib
mkdir xxrlt/12.0.0/out
mkdir xxrlt/12.0.0/log
2)Add the custom module into the environment
cd $APPL_TOP
vi customPROD_app01.env
XXRLT_TOP=/sandb1/oracle/PROD/apps/apps_st/appl/
xxrlt/12.0.0
export XXRLT_TOP
source the environment file (/u01/oracle/PROD/apps/
apps_st/appl/APPSPROD_pkgprod.env)
Make entry to context file
/u01/oracle/PROD/inst/apps/PROD_pkgprod/appl/admin/
PROD_pkgprod.xml
oa_enabled="FALSE">/u01/oracle/PROD/apps/apps_st/appl/
xxrlt/12.0.0
cd $INST_TOP/admin/install
sh adgentopfile.sh
Open new session, source environment file, and stop
middle tier services, run autoconfig.
Open new session, source environment file, check for
custom top in topfile.txt in $APPL_TOP/admin, start
the middle tier services.
3)create tablespace XXRLT datafile '/u01/oracle/PROD/
db/apps_st/data/xxrlt01.dbf' size 500M
4)create user xxrlt identified by xxrlt
default tablespace xxrlt
temporary tablespace temp1
quota unlimited on xxrlt
grant connect, resource to xxrlt;
5)Register your Oracle Schema.
Login to Applications with System Administrator
responsibility
Navigate to Application-->Register
Application = XXRLT Custom Application
Short Name = XXRLT
Basepath = XXRLT_TOP
Description = XXRLT Custom Application
6)Register Oracle User
Naviate to Security-->Oracle-->Register
Database User Name = XXRLT
Password = XXRLT
Privilege = Enabled
Install Group = 0
Description = XXRLT Custom Application User
7)Add Application to a Data Group
Navigate to Security-->Oracle-->DataGroup
Data Group = XXRLTGroup
Description = XXRLT Custom Data Group
Click on "Copy Applications from" and pick Standard data Group, then add the following entry.
Application = XXRLT Custom
Oracle ID = APPS
Description = XXRLT Custom Application
8)Create custom request group
This will act as a placeholder for any custom reports we wish to make available for the Custom Responsibility (which is defined at a later stage)
Navigate to Security-->responsbility-->Request
Group = XXRLT Request Group
Application = XXRLT Custom
Code = XXRLT
Description = XXRLT Custom Requests
We will not define any requests to add to the group at this stage, but you can add some now if required.
9)Create custom menu
This will act as a placeholder for any menu items we wish to make available for the Custom Responsibility (which is defined at a later stage). We will create two menus, one for Core Applications and one for Self Service.
Navigate to Application-->Menu
Menu = XXRLT_CUSTOM_MENU
User Menu Name = XXRLT Custom Application
Menu Type =
Description = XXRLT Custom Application Menu
Seq = 100
Prompt = View Requests
Submenu =
Function = View All Concurrent Requests
Description = View Requests
Seq = 110
Prompt = Run Requests
Submenu =
Function = Requests: Submit
Description = Submit Requests
Menu = XXRLT_CUSTOM_MENU_SSWA
User Menu Name= XXRLT Custom Application SSWA
Menu Type =
Description = XXRLT Custom Application Menu
for SSWA
10)Create new responsibility. One for Core Applications
and one for Self Service (SSWA)
Navigate to Security-->Responsibility-->Define
Responsibility Name = XXRLT Custom
Application = XXRLT Custom
Responsibility Key = XXRLTCUSTOM
Description = XXRLT Custom Responsibility
Available From = Oracle Applications
Data Group Name = XXRLTGroup
Data Group Application = XXRLT Custom
Menu = XXRLT Custom Application
Request Group Name = XXRLT Request Group
Responsibility Name = XXRLT Custom SSWA
Application = XXRLT Custom
Responsibility Key = XXRLTCUSTOMSSWA
Description = XXRLT Custom Responsibility
SSWA
Available From = Oracle Self Service Web
Applications
Data Group Name = XXRLTGroup
Data Group Application = XXRLT Custom
Menu = XXRLT Custom Application SSWA
Request Group Name = XXRLT Request Group
11)Add responsibility to user
Navigate to Security-->User-->Define
Add XXRLT Custom responsibility to users as required.
12) Other considerations
You are now ready to create your database Objects, custom
Reports, Forms, Packages, etc
Create the source code files in the XXRLT_TOP directory
appropriate for the type of object. For example forms
would be located in $XXRLT_TOP/forms/US or package source
code in $XXRLT_TOP/admin/sql for example.
Database Objects, such as tables, indexes and sequences
should be created in the XXRLT schema, and then you
need to
a) Grant all privilege from each custom data
object to the APPS schema.
For example : logged in as XXRLT user
grant all privileges on myTable to apps;
b) Create a synonym in APPS for each custom
data object
For example : logged in as APPS user
create synonym myTable for XXRLT.myTable;
13) Login to sysadmin, Application Developer Responsibility
Application > Form ( Register the form )
Application > Funtion ( Add the form to a function )
Application > Menu ( Attach the function to a menu )
Menu that is added to a particular responsbility is
given to specific user
Security > User > Define |
| posted by Senthil Kumaran @ 5:08 AM |
|
|
|
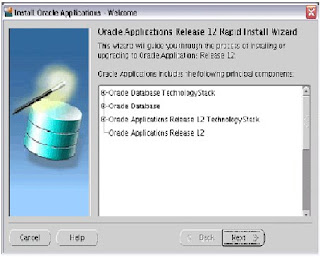
| Release12 installation |
|
Disk space requirements:
------------------------
Application node(Fresh & Vision database)- 28GB
Database node for Fresh database - 45GB
Database node for Vision demo database - 133GB
Stage area size - 33GB
Total Space for fresh Install - 73GB
Total Space for Vision - 161GB
Operating System Name Supported Version
--------------------- ------------------
Red Hat Enterprise Linux 4.0-Update 4/higher(32-bit)
Kernel Requirements:
--------------------
The following table lists the required minimum
kernel versions.
Operating System :RedHat Enterprise Linux AS/ES 4.0
Kernel Instructions:2.6.9-42.EL
To determine version, $ uname - r
Required Packages:
-----------------
Check required rpms installed or not (Eg : rpm –q glibc-2.3.4-2.25 )
glibc-2.3.4-2.25
glibc-common-2.3.4-2.25
binutils-2.15.92.0.2-21
compat-libstdc++-296-2.96-132.7.2
gcc-3.4.6-3
gcc-c++-3.4.6-3
libgcc-3.4.6-3
libstdc++-3.4.6-3
libstdc++-devel-3.4.6-3
openmotif21-2.1.30-11.RHEL4.6
pdksh-5.2.14-30.3
setarch-1.6-1
make-3.80-6.EL4
gnome-libs-1.4.1.2.90-44.1
sysstat-5.0.5-11.rhel4
compat-db-4.1.25-9
control-center-2.8.0-12.rhel4.5
xscreensaver-4.18-5.rhel4.11
libaio-0.3.105-2
libaio-devel-0.3.105-2
Sites to Download Rpms:
-----------------------
http://rpm.pbone.net/
http://linuxsoft.cern.ch/
Software Requirements:
----------------------
Check this Softwares installed. (Eg :which ar)
Ar, gcc , g++ , ld , ksh, make, Xdisplay
Kernel Settings:
----------------
Set following kernel parameters in /etc/sysctl.conf
set kernel.semmsl=256
set kernel.semmns=32000
set kernel.semopm=100
set kernel.semmni=142
set kernel.shmall=2097152
set kernel.shmmax=2147483648(half of memory)
set kernel.shmmni=4096
set kernel.msgmax=8192
set kernel.msgmnb=65535
set kernel.msgmni=2878
set fs.file-max=65536
set net.ipv4.ip_local_port_range=1024 65000
set net.core.rmem_default=262144
set net.core.rmem_max=262144
set net.core.wmem_default=262144
set net.core.wmem_max=262144
Domain Name System (DNS) Resolver Parameters:
---------------------------------------------
Following entries to these minimum settings in
the /etc/resolv.conf file on each server node:
options attempts:5
options timeout:15
Verifying Host Names:
Verify that the /etc/hosts file is formatted
as follows:
127.0.0.1 localhost.localdomain localhost
.
Eg: 192.9.200.7 vis.oneapps.com vis
Verify that the /etc/sysconfig/network file is formatted
as follows:
HOSTNAME=vis.oneapps.com
If the /etc/sysconfig/networking/profiles/default/network
file exists, remove it. If you changed any files in the
previous steps, restart the system.
Modifying the Number of Open File Descriptors:
----------------------------------------------
Open the /etc/security/limits.conf file and change
the existing values for "hard" and "soft" parameters as
follows. Restart the system after making changes.
* hard nofile 65535
* soft nofile 4096
* hard nproc 16384
* soft nproc 2047
Net Service Listeners in Multi-user Installations:
$ chmod 777 /var/tmp/.oracle
Creating the Stage Area Directory:
Create directory for staging
$cd /
$mkdir stage
Verify software version (perl).
You must have perl 5.0053 or higher installed, and
it must be in your PATH. Use the following commands
to identify the perl version and its location. The
command is the same for both UNIX and Windows platforms:
$perl -v
Mount the DVD
Run the adautostg.pl script.
$ perl /mnt/cdrom/Disk1/rapidwiz/adautostg.pl
Before starting installation check rapidwiz version:
Current Version of Rapid Install
The most current version of the Rapid Install wizard
is 12.0.0.22. You can obtain this version by applying
patch 5885627, available at OracleMetaLink. To verify
your current version, use the RapidWizVersion
executable, located in the rapidwiz directory on the
Start Here DVD. For example:
UNIX:
$ cd /Stage12/startCD/Disk1/rapidwiz
$ ./RapidWizVersion
To update the Start Here DVD, uncompress the patch in
the main staging area to overwrite the startCD
directory.
For example:
UNIX:
$ cd /Stage12
$ unzip -o p5885627_R12_GENERIC.zip
OS user account settings:
Create group for user
$groupadd dba
$useradd –g dba oracle
$useradd –g applmgr
Change read write execute permission and ownership
to directories where going to install application
and database
$chmod 777 /u01
$chmod 777 /u02
Start installation
$ /stage/Stage12i/startCD/Disk1/rapidwiz/rapidwiz
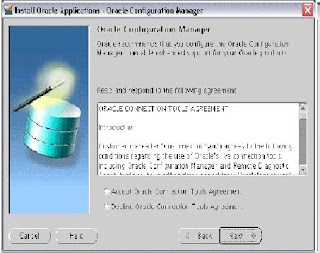
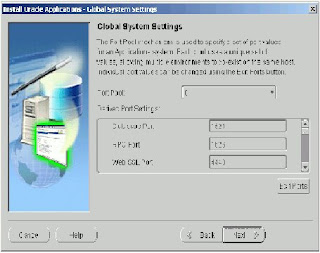
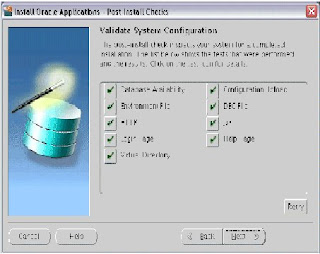
Screen Shots:
-------------
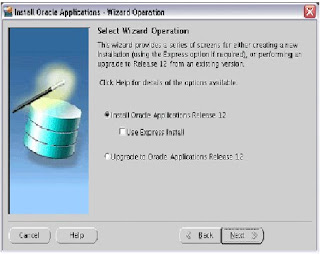
Choose decline-->
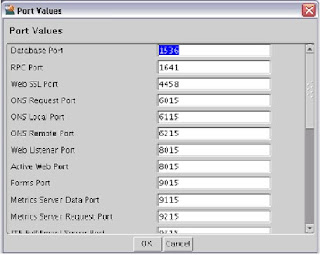
Choose the portpool-->
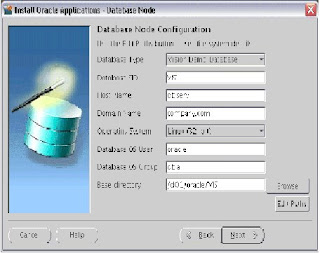
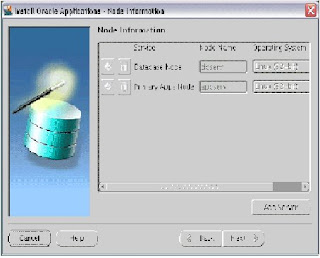
Give database node information-->
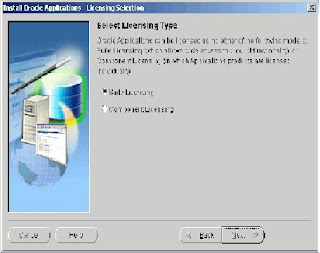
Choose license type-->
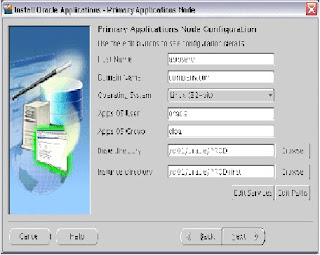
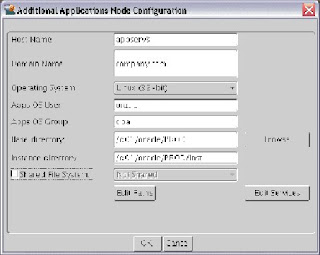
Give application node information-->
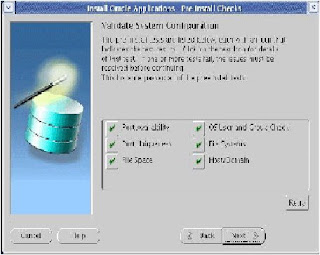
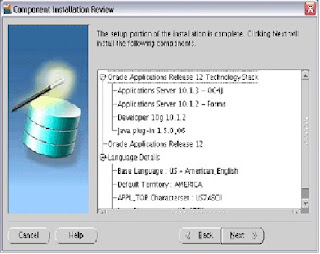
Here you can see the system architecture-->

References:
-----------
Metalink Note: 402310.1
Oracle Applications Installation and Upgrade
Notes Release 12 for Linux (32-bit)
Metalink Note: 405565.1
Oracle Applications Release 12 Installation
Guidelines
Metalink Note: 405293.1
Oracle Applications Release Notes Release 12
B31295-04
http://download.oracle.com/docs/cd/B40089_05/current/
acrobat/120oaig.pdf |
| posted by Senthil Kumaran @ 3:09 AM |
|
|
|
| Creating recovery catalog in remote database |
|
Server A - Target database (PROD)
Server B - Recovery Catalog database (catdb)
General settings:
-----------------
1. RDBMS version and OS version should be same in Server A
and Server B.
2. Server A and B should ping each other. Check each other
entries in /etc/hosts file.
3. Copy the tnsname.ora entry (server A) add it in server B
tnsname.ora entry and vice versa. Then check tnsping is happening to each other.
Step -1: Create password file on target DB (server A)
-------
$orapwd file=orapwORACLE_SID (filename) password=password
Eg: - $orapwd file=orapwPROD password=rolta2k
(oracle password file default file location is
$ORACLE_HOME/dbs)
Then,
Add parameter remote_login_passwordfile=EXCLUSIVE in
server A initSID.ora
And bounce the database once.
After done this settings you should be able to connect
server A from server B vice versa through sqlplus.
Eg: - From Server B just execute,
$sqlplus sys/sys@PROD as sysdba
vice versa from server A also,
Step -2: Create tablespace for recovery catalog to store
--------
the target database information in catdb(server B).
Connect to catalog DB (Server B) where you we need to
configure the recovery catalog.
$sqlplus “/as sysdba”
sql>CREATE TABLESPACE rman
DATAFILE '/u02/app/oradata/rman/rman01.dbf' size 500m;
Step -3: Create the Recovery Catalog Owner in the new
--------
database(CATDB)
Sql>CREATE USER rman IDENTIFIED BY rman
DEFAULT TABLESPACE rman
QUOTA UNLIMITED ON rman;
Step –4:Grant the necessary privileges to the schema owner
--------
sql> GRANT connect, resource, recovery_catalog_owner TO rman;
Here the role \"RECOVERY_CATALOG_OWNER\" provides the user
with all privileges required to maintain and query the
recovery catalog.
Step –5:Creating the Recovery Catalog
--------
Connect to the Server -B which will contain the catalog as
the catalog owner.
$ rman catalog rman/passwd@catdb
Eg: - $rman catalog rman/rman@UAT04
Recovery Manager: Release 10.2.0.2.0 - Production
Copyright (c) 1982, 2005, Oracle. All rights reserved.
Connected to recovery catalog database
Step –6:Run the CREATE CATALOG command to create the catalog
--------
RMAN> CREATE CATALOG;
recovery catalog created
Step – 7: Registering Target Database in the Recovery Catalog
---------
Connect to the target(Server A) database and recovery
catalog database(Server B). Execute this in catdb(server B)
$ rman target sys/passwd@prod catalog rman/passwd@catdb
Eg: - $rman target sys/sys@NPROD catalog rman/rman@UAT04
Then, register the target database in recovery catalog
RMAN> REGISTER DATABASE;
Then, to identify whether has registered properly, execute
the below command
RMAN> REPORT SCHEMA;
It will show the target database (Server A) datafile paths.
For additional reference:
-------------------------
http://download.oracle.com/docs/cd/B19306_01/backup.102/
b14194/rcmsynta045.htm#sthref722
http://www.dbapool.com/articles/04110701.html
http://www.oracle-base.com/articles/9i/RecoveryManager9i.php
Metalink Doc ID: 360416.1
Subject: Oracle10g - Getting Started with Recovery Manager(RMAN) |
| posted by Senthil Kumaran @ 12:25 AM |
|
|
|
| Enabling SSL for E-Business suite |
| Monday, May 5, 2008 |
Enabling SSL for E-Business Suite
==============================
url - https://visclone.oneapps.com
ip - 192.9.200.215
application version – 11.5.10.2
database version – 9.2.0.6.0
Referred metalink document - 123718.1
Common setups:
--------------
Set this following settings in application user
.bash_profile.
#su – apple
#vi .bash_profile
SCRIPT_TOP=/u01/oracle1/viscomn/admin/scripts/
visclone_visclone/
APACHE_TOP=/u01/oracle1/visora/iAS/Apache/
OPENSSL_TOP=/u01/oracle1/visora/iAS/Apache/open_ssl
OPENSSL_CONF=/u01/oracle1/visora/iAS/Apache/open_ssl/
bin/openssl.cnf
Save and quit.
:wq
Provide certificate for HTTP Server:
------------------------------------
Creating work directory to keep private key as well as
certificate files.
#mkdir /u01/oracle1/viscomn/admin/certs
# mkdir /u01/oracle1/viscomn/admin/certs/apache
Sub-directories:
# mkdir /u01/oracle1/viscomn/admin/certs/apache/ssl.crt
# mkdir /u01/oracle1/viscomn/admin/certs/apache/ssl.key
Edit the following value in .xml file.
#vi /u01/oracle1/visappl/admin/visclone_visclone.xml
/u01/oracle1/viscomn/admin/certs/apache
Checking the value of RANDFILE in OPENSSL_CONF,
It should be
RANDFILE = $ENV::HOME/.rnd
Creating server PEM-encoded private key file
--------------------------------------------
#cd /u01/oracle1/viscomn/admin/certs/apache/
Execute this following command ,
cd $OPENSSL_TOP/bin
openssl genrsa -des3 -out apache_1024.key 1024
it will ask to enter the PEM pass phrase:oneapps123
(to avoid confusion give common password for all).
Go to file $OPENSSL_CONF,
And edit the follow line
dir = ./demoCA as
dir = . /u01/oracle1/viscomn/admin/certs/apache/
(Specify directory which is created to keep the
private and certificate files)
Generating certificate signing request(CSR)
-------------------------------------------
#cd /u01/oracle1/viscomn/admin/certs/apache/
Execute following command,
cd $OPENSSL_TOP/bin
openssl req -config $OPENSSL_CONF -new -key
apache_1024.key -out apache_1024.csr
It will ask following details,
Enter the PEM pass phrase :oneapps123
Country Name(2 letter code) :IN
State or Province Name :Karnataka
Locality Name (e.g., City) :Bangalore
Organization Name :oneAPPS
Organizational Unit Name :httpserver
Common Name :vis.oneapps.com(hostname)
E-mail Address :kumaran@oneapps.com
Remaining you can skip.
Submitting certificate request(CSR)to
-------------------------------------
certificate authority(CA)
-------------------------
Go to the website www.verisign.com and search
“trial certificate”.Just register for trial certificate
and finally it will ask you to submit your CSR, copy
the apache_1024.csr
#cat /u01/oracle1/viscomn/admin/certs/apache/
apache_1024.csr
And paste in verisign site.(copy full content of the file,
Don’t skip anything) And click submit. You will receive the
certificate with in a hour.
Creating the server PEM-encoded certificate file
------------------------------------------------
Do the pre-requisites which is mentioned in e-mail, you
need to follow only the first step(ROOT CA certificate)
In first link you will get the ROOT CA certificate copy
and save in a.cer format in your local machine.
Steps for Microsoft browser
---------------------------
1.open internet explorer->tools->internet options->
content->certificates->import->next->select file
types all, select a.cer->open->next->select Automatically
select the certificate store based on the type of the
certificate->OK->finish->Yes.
Steps for firefox browsers:
---------------------------
1.open firefox->tools->options->Advanced->veiw certificates
->Authorities->import->a.cer->open->check trust this CA to
identity websites->Ok.
Then,
Copy the certificate which you received in your e-mail and
save it as a apache_1024.crt. then ftp to server
$ ftp 192.9.200.215
Username:apple
Password:apple
ftp>bin
ftp>hash
ftp>cd /u01/oracle1/viscomn/admin/certs/apache/
ftp>put apache_1024.crt
Creating the file of PEM-encoded Server
----------------------------------------
Certificates(ca.crt)
--------------------
From your local machine,
Open internet explorer.Go to File->open->browse file
apache_10247.crt ->click OK.
In certificate window click ->certification path on the
first line->then view certificate->details->copy to
file->next->select Base-64 encoded X.509->next->
enter name as ca->export->close.
From your local machine,
ftp 192.9.200.215
username:apple
password:apple
ftp>bin
ftp>hash
ftp>cd /u01/oracle1/viscomn/admin/certs/apache/
ftp>put ca.crt
Copy server key and certificate :
---------------------------------
In server machine,
#cd $ COMMON_TOP/admin/certs/apache
# cp apache_1024.crt $COMMON_TOP/admin/certs/apache/
ssl.crt/server.crt
# cp apache_1024.key $COMMON_TOP/admin/certs/apache/
ssl.key/server.key
# cp $APACHE_TOP/Apache/conf/ssl.crt/ca-bundle.crt $COMMON_TOP/admin/certs/apache/ssl.crt/ca-bundle.crt
# cp ca.crt $COMMON_TOP/admin/certs/apache/ssl.crt/
ca.crt
Certificate provisioning for Forms 6i Server:
---------------------------------------------
Create wallet directory.
#mkdir $COMMON_TOP/admin/certs/forms/
#su – apple
#cd $ORACLE_HOME/
#xhost +
#export DSIPLAY=192.9.200.215:0.0
#echo $DISPLAY(check display)
#export THREADS_FLAG=native
#cd bin/
#owm
In wallet manager,Newselect No for prompt->create
wallet password->(oneapps123)->Ok->Yes.
(A empty wallet created..)
it will ask the following details.
Common Name :vis.oneapps.com
Organizational unit :Forms
Organization :oneAPPS
Locality/City :Bangalore
State Province :karanataka
Country :IN
Key size :512
->Ok. It will show the message certificate was created
submit Certificate Authority.Select wallet and check
auto login check box is checked.Save in the location
$COMMON_TOP/admin/certs/forms
Submitting Certificate Request(CSR)to Certificate
-------------------------------------------------
Authority(CA):
--------------
Goto www.verisign.com and search for “trial certificate”.
Copy and paste the .csr from the wallet to verisign and
submit.
Creating the server PEM-encoded certificate file
------------------------------------------------
Do the pre-requisites which is mentioned in e-mail, you need
to follow only the first step(ROOT CA certificate)
In first link you will get the ROOT CA certificate copy and
save in a1.cer format in your local machine.
Steps for Microsoft browser.
2.open internet explorer->tools->internet options->content->
certificates->import->next->select file types all,select
a1.cer->open->next->select Automatically select the
certificate store based on the type of the certificate->
OK->finish->Yes.
Steps for firefox browsers:
2.open firefox->tools->options->Advanced->veiw certificates->
Authorities->import->a1.cer->open->check trust this CA to
identity websites->Ok.
Once you received the certificate save as forms_512.crt and
ftp to server,
ftp 192.9.200.215
username:apple
password:apple
ftp>bin
ftp>hash
ftp>cd $COMMON_TOP/admin/certs/forms
ftp>put forms_512.crt
ftp>bye
Import User certificate in to Wallet Manager:
---------------------------------------------
In wallet manager OperationsImport user certificates->
check radio for select file contains the certificate->
Ok.
Give full path of certificate file where stored,
/u01/oracle1/viscomn/admin/certs/forms/
Highlight the forms_512.crt->Ok.(see the message at
bottom certificate successfully imported).
Got the error!
User certificate import has failed because the CA certificate
doesn't exist.
Do you want to import a CA certificate now?
Yes->check the radio button for select the file that contains
the certificate->/u01/oracle1/viscomn/admin/certs/forms/
and highlight the file CA_root.cer->Ok.
Configuring SSL with HTTP server
--------------------------------
Make the changes in .xml file http to https
#vi /u01/oracle1/visappl/admin/visclone_visclone.xml
%s_url_protocol
%s_local_url_protocol
%s_webentryurlprotocol
%s_frmConnectMode
%s_apps_portal_url
%s_webssl_port keep as 443(default)
%s_active_webport 443
%s_webport 443
"s_forms60_wallet">/u01/oracle1/viscomn/admin/certs/
forms
#vi /u01/oracle1/viscomn/html/bin/appsweb.cfg
connectMode=https
Edit scripts in the following location,
#cd $SCRIPT_TOP/adfractl.sh
f60ctl start port=$FORMS_PORT mode=https exe=f60webmx >
$FRMLOG 2>/dev/null
#SCRIPT_TOP/adfrmctl.sh
f60ctl start port=$FORMS_PORT mode=https exe=f60webmx >
$FRMLOG 2>/dev/null
Through OAM->sitemap->autoconfig>configuration wizard->
forms listener servlet
->enable OAM->sitemap->autoconfig->configuration wizard->
ssl->enable
Edit the file,
#vi $COMMON_TOP/portal/visclone_visclone.xml/aplogon.html
a href="https://visclone.oneapps.com/oa_servlets/AppsLogin"
target=_top (remove the web listener port)
Clear the cache in this location,
#sh $SCRIPT_TOP/adapcctl.sh stop (root user)
#cd $COMMON_TOP/_pages
#rm –f *
#sh $SCRIPT_TOP/adapcctl.sh start (root user)
Bounce all services once.
If Apache is not starting try to start as a root user.
And check the error for Apache logs. So now you can
use https instead of using http. In next post i'll
update concept of https and its advantages. |
| posted by Senthil Kumaran @ 5:46 AM |
|
|
|
| Cleaning temporary tablespace |
|
Run ICXDLTMP.sql
Location in Release12 $FND_TOP/patch/115/sql/ICXDLTMP.sql
Running ICXDLTMP.sql is equivalent to running "Purge data from temporary table" concurrent request. |
| posted by Senthil Kumaran @ 5:27 AM |
|
|
|
| Changing apps password |
|
1. Just make sure that your Concurrent Manager is down. There should'nt be any running FNDLIBR process.
2. FNDCPASS apps/apps_old_pwd 0 Y system/system_pwd SYSTEM APPLSYS apps_new_pwd
3. Try new SQLPLUS connection with new apps password. sqlplus apps/apps_new_pwd
4. Change apps password in the following file. vi $IAS_ORACLE_HOME/Apache/modplsql/cfg/wdbsvr.appit will be under fnd_top in release12
5. Start the concurrent manager.
Note: Dont ever change oracle applications apps password through SQLPLUS. Always use the above procedure to change apps password. |
| posted by Senthil Kumaran @ 5:21 AM |
|
|
|
| Executing gather schema statistics at backend. |
|
exec dbms_stats.gather_schema_stats('GL', options=>'GATHER', estimate_percent=>DBMS_STATS.AUTO_SAMPLE_SIZE, method_opt=>'FOR ALL COLUMNS SIZE AUTO', cascade=>TRUE);
exec dbms_stats.gather_schema_stats('AP', options=>'GATHER', estimate_percent=>DBMS_STATS.AUTO_SAMPLE_SIZE, method_opt=>'FOR ALL COLUMNS SIZE AUTO', cascade=>TRUE);
exec dbms_stats.gather_schema_stats('AR', options=>'GATHER', estimate_percent=>DBMS_STATS.AUTO_SAMPLE_SIZE, method_opt=>'FOR ALL COLUMNS SIZE AUTO', cascade=>TRUE);
exec dbms_stats.gather_schema_stats('PA', options=>'GATHER', estimate_percent=>DBMS_STATS.AUTO_SAMPLE_SIZE, method_opt=>'FOR ALL COLUMNS SIZE AUTO', cascade=>TRUE);
exec dbms_stats.gather_schema_stats('FA', options=>'GATHER', estimate_percent=>DBMS_STATS.AUTO_SAMPLE_SIZE, method_opt=>'FOR ALL COLUMNS SIZE AUTO', cascade=>TRUE);
exec dbms_stats.gather_schema_stats('APPS', options=>'GATHER', estimate_percent=>DBMS_STATS.AUTO_SAMPLE_SIZE, method_opt=>'FOR ALL COLUMNS SIZE AUTO', cascade=>TRUE);
exec dbms_stats.gather_schema_stats('APPLSYS', options=>'GATHER', estimate_percent=>DBMS_STATS.AUTO_SAMPLE_SIZE, method_opt=>'FOR ALL COLUMNS SIZE AUTO', cascade=>TRUE);
exec dbms_stats.gather_schema_stats('CE', options=>'GATHER', estimate_percent=>DBMS_STATS.AUTO_SAMPLE_SIZE, method_opt=>'FOR ALL COLUMNS SIZE AUTO', cascade=>TRUE); |
| posted by Senthil Kumaran @ 5:15 AM |
|
|
|
|
| About Me |
|

Name: Senthil Kumaran
Home: Oslo, Oslo, Norway
About Me: I'm working as a oracle applications dba(Apps DBA OCP) and fusion middleware.This views are my own only and not neccessary to match with others
See my complete profile

|
| Previous Post |
|
| Archives |
|
|
| Links |
|
|
| Powered by |
 |
| Add On |
|
|

|

|

|

|

|
|


